Getting Started
A quick guide to get started with the Skeletal Decals plugin.
Installing the Plugin
Download
Download the plugin from the Fab tab in the Epic Games Launcher.
Install
Click Install to engine and select your installed Unreal Engine version.
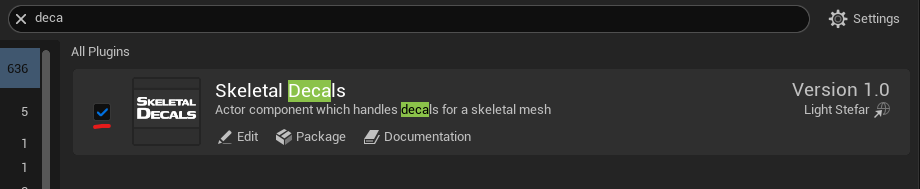
Open Plugins Window
Open your project, go to Edit → Plugins, and find the Skeletal Decals plugin window.
decal in search bar.Enable the Plugin
Enable the plugin by checking its box as shown below.
Quickstart
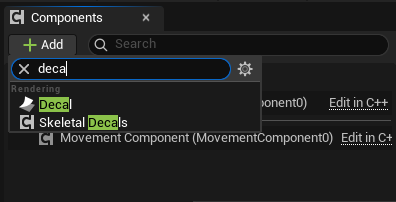
Add skeletal decals component
Open the preferred actor blueprint and press the Add component button at the top-left. Type decal in the search bar and select Skeletal Decals Component.
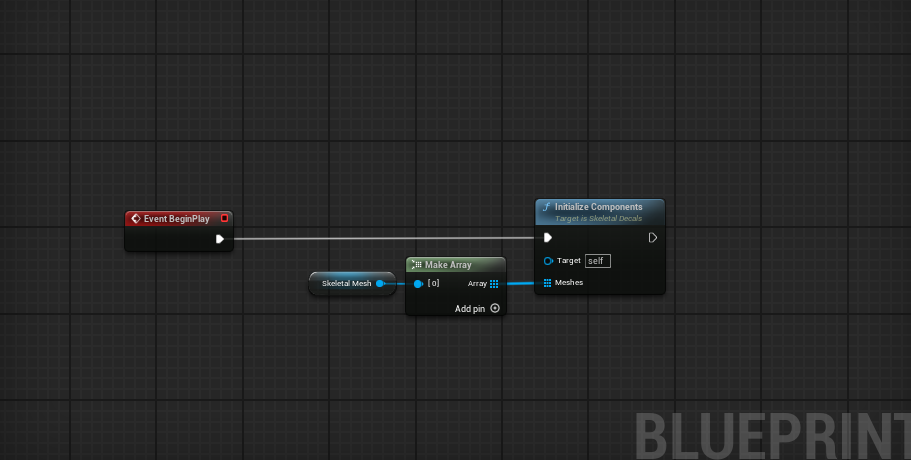
Add Blueprint events
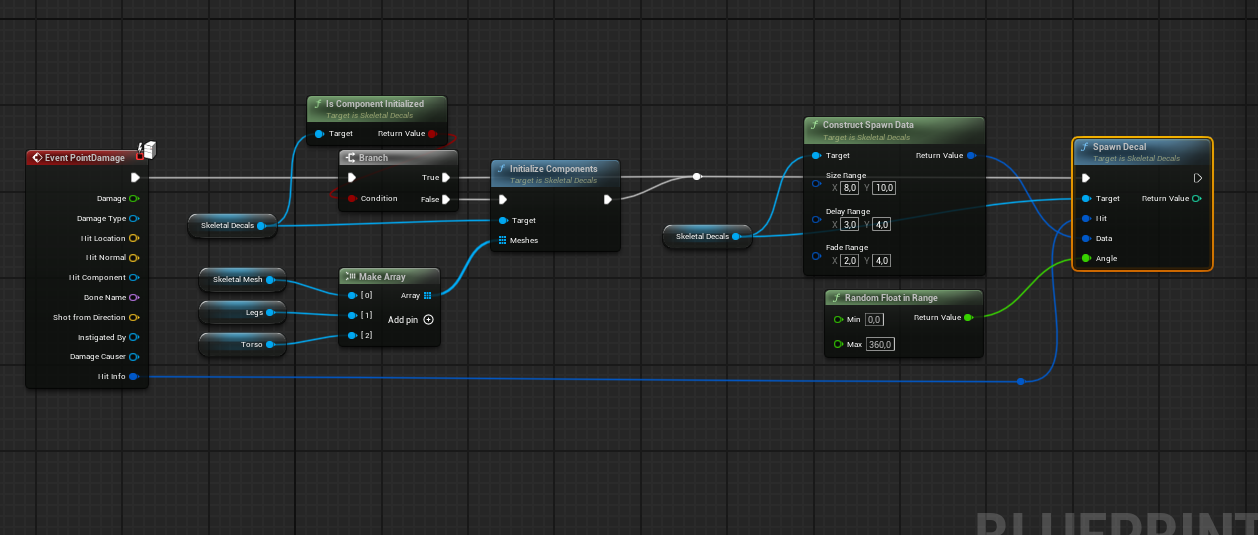
Navigate to the BeginPlay event in your actor’s graph and initialize the skeletal mesh components into the skeletal decals component, as shown below.
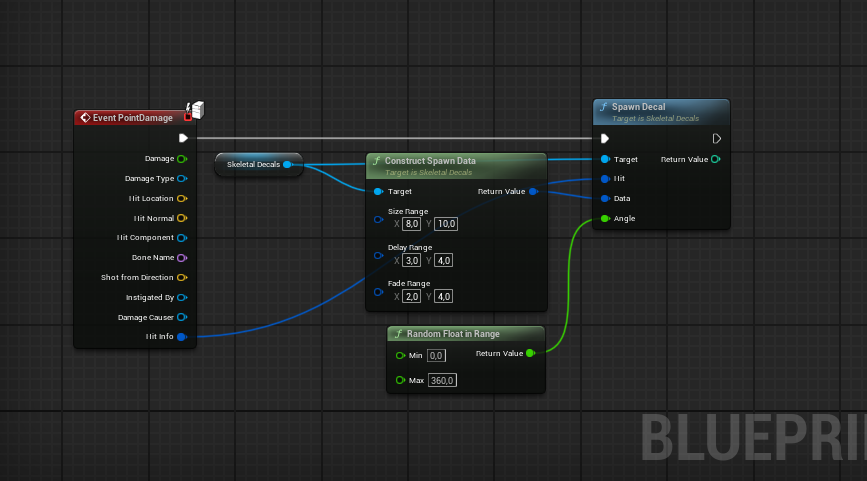
Navigate to the PointDamage event (or any other event that generates damage) in your actor’s graph and add SpawnDecal node from the skeletal decals component, as shown below.
When managing a large number of modular NPCs or characters, a more advanced and performant setup is recommended. Instead of initializing components during BeginPlay—which creates render targets even for actors that never take damage—consider moving initialization to the damage event itself. This approach improves memory efficiency by ensuring resources are only allocated when needed.
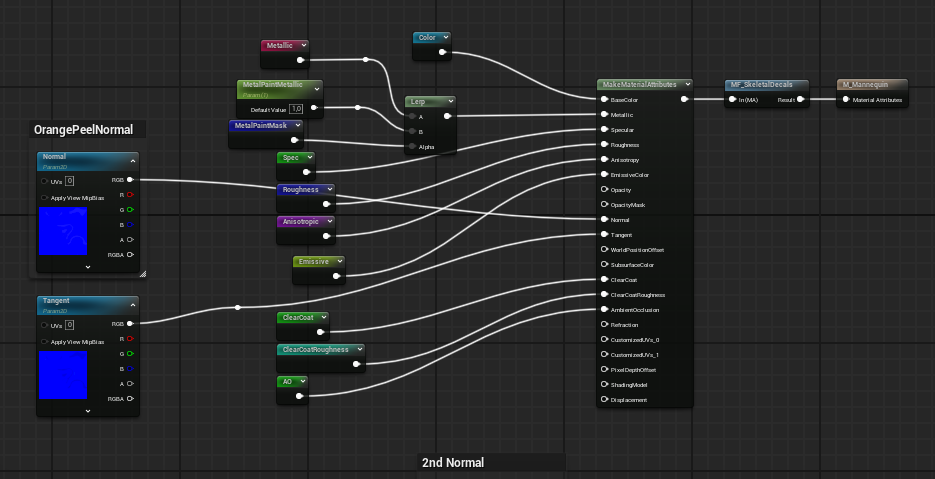
Add material function
Open your actor’s material and right-click in the graph. Type skeletal in the search bar.
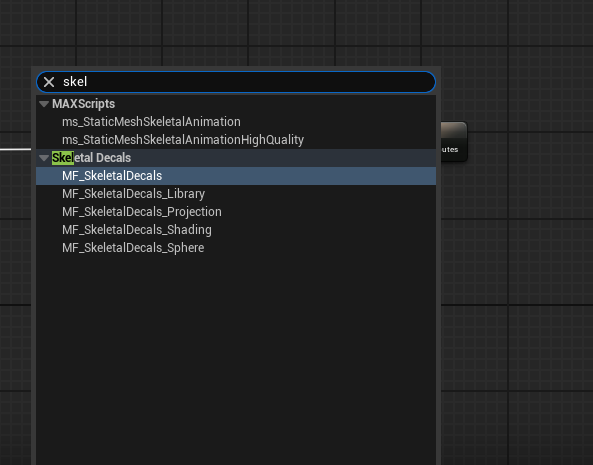
Select MF_SkeletalDecals and add it to the material graph, as shown below.
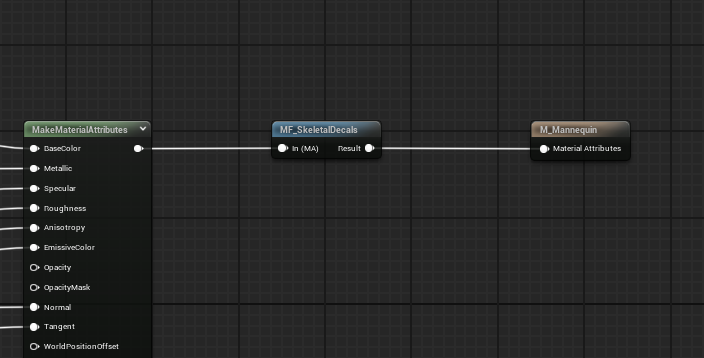
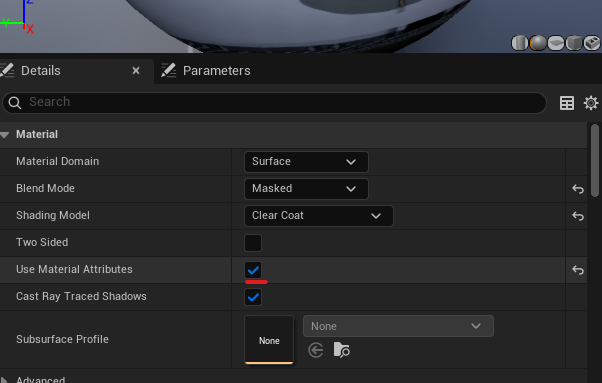
If the material doesn’t have the same pins as shown above, it needs material attributes enabled. To enable them, check Use Material Attributes in the Details panel.
Update your material setup to support material attributes, as shown below.